Tampilkan postingan dengan label pinterest inspired designs. Tampilkan semua postingan

Minggu, 09 Juni 2024

crochet love letter book sleeve pattern (the cutest way to gift a book!)

Hi everyone! Here's a Pinterest-inspired love letter book sleeve that's made to measure.

A note on this pattern: I've included step-by-step instructions with pictures for how I made the book sleeve part and heart charm, but if you're a complete beginner, you might not be able to make this. This pattern is similar to my "it ends with us" inspired book sleeve, but uses single crochet instead of half double. Additionally, with this pattern, I'm taking credit for the way in which I crocheted the book sleeve and heart to look like a letter, NOT the idea behind it since I came across the concept on Pinterest. That being said, I can't wait to see what you come up with! Please tag me in your creations (or send me a picture!) and feel free to DM me on Instagram (@mahumcrochets) if you have any questions.

Materials & Terminology:

I used a 4.5 mm hook, off-white and red yarn appropriate for that hook size, and a titch button to secure the sleeve when closed. Abbreviations (US terms): SC - single crochet, SS - slip stitch, CH - chain, DC - double crochet, TC - triple crochet, SC2TOG - single crochet 2 stitches together, this is basically a sc decrease, to do this: insert hook into a stitch, yarn over and pull up a loop (2 loops on your hook), insert hook into the next stitch, yarn over and pull up a loop (3 loops of your hook), yarn over and pull through all the 3 loops on the hook.

Part 1: The body of the sleeve

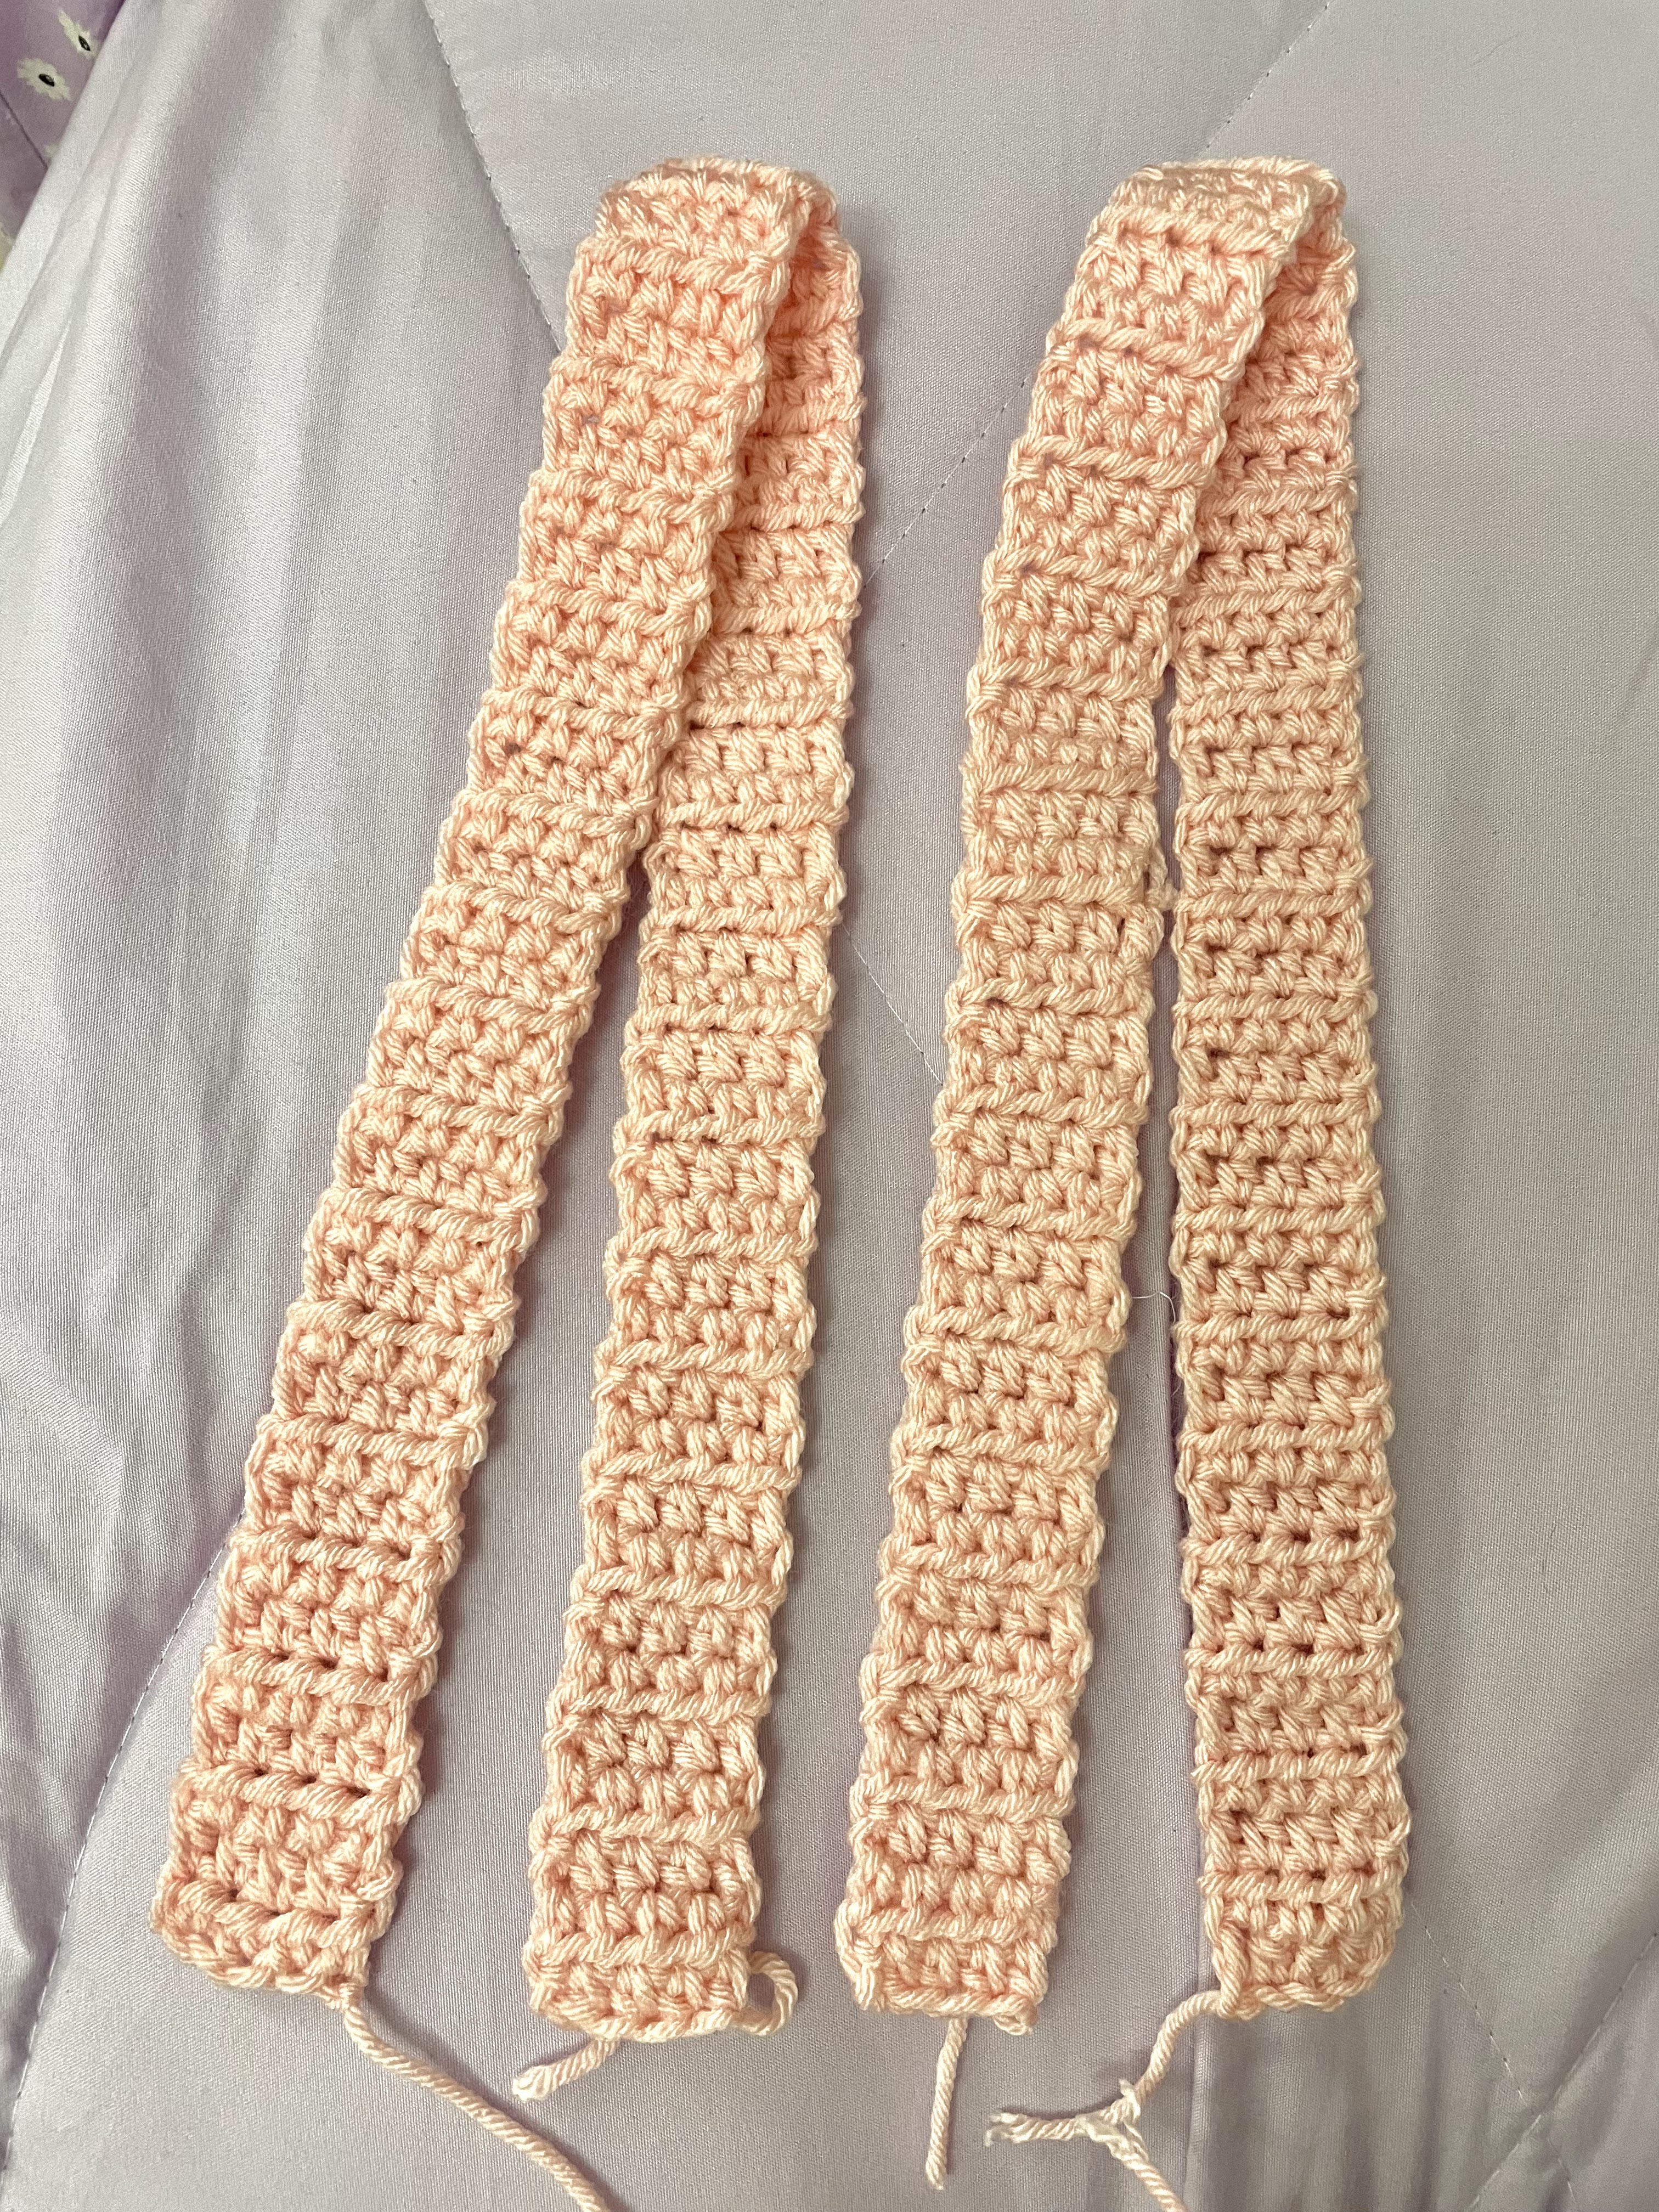
Start by making a slipknot and chain the length of your book's spine, sc into the 2nd ch from your hook, sc 1 in each ch till the end of the row, when you reach the last ch - sc 3 into that same ch.

Now you'll be working on the other side of your chains not on top of the sc row that you just made. Insert 1 sc into every bottom ch till the end of the row, when you reach the space where you inserted your very first sc in the beginning - insert 2 more sc into the same ch space (total 3 sc in that space), now you'll be working in rounds without any increases or chains in between - keep inserting 1 sc into every stitch till the sleeve is as big as you want.


Part 2: The envelope flap

Once the body of your sleeve is as big as you want, stop crocheting in rounds and instead do 2-3 rows of sc. To do this: sc halfway around your sleeve (like the arrow in the picture), turn your work and sc into the same stitch that you just made, sc 1 in every stitch till the end of the row, continue doing 2-3 rows (start a new row by turning your work and sc into the last stitch you made at the end of the previous row). These rows will cover your book when you close the "love letter", if you don't do them then the corners of your book will show when you close the flap.


To make the triangle part, start your new row with a sc2tog (see the "materials & terminology" part for how to do this), sc 1 in every stitch across the row till you have 2 stitches left, sc2tog to end the row.

Start the next row by turning your work, then sc2tog, sc 1 in every stitch across the row till you have 2 stitches left, sc2tog to end the row. Repeat doing rows till you have 1 stitch left at the top, ch 1 or 2 to fasten off and cut.

To make the flap neater, we're going to do a border of ss down both sides of the triangle. Attach your yarn with a knot at one end of the triangle (any bottom side), ss around the sides of the triangle (there's no definite place to insert your hook so just insert it as closest to the edge as you can), ch 1 or 2 to fasten off and cut.

Part 3: The Heart <3

Start by making a magic ring and ch 2. 
Insert all of the next stitches into the magic ring: 
3 tc, 3 dc, ch 1, 1 tc, ch 1, 3 dc, 3 tc, ch 2, ss into the magic ring, ch 1 or 2 then cut and fasten off by tightening the ends.
I added a titch button to my book sleeve to keep the flap secure when I close it. Then, I sewed the heart onto the flap.

And you're done!

I hope you found this pattern helpful, I'm still in the process of learning and trying to navigate the crochet community, so I'd love feedback from you! Please let me know what could've been improved or just your general thoughts on the pattern. I can't wait to see what you all create, don't forget to tag me on Instagram, and happy crocheting!


https://x.com/CB01MecontroTe
https://www.artstation.com/artwork/8b9gDQ
https://www.artstation.com/sub-ita-me-contro-te-il-film-operazione-spie-streaming-ita/profile
https://sub-ita-me-contro-te-ilfilm.tumblr.com
https://cb01-me-contro-te-il-film-intero.tumblr.com
https://cb01-hd-me-contro-te-il-film-ita.tumblr.com
https://me-contro-te-il-film-intero-cb01.tumblr.com
https://medium.com/@shoyohinata352/sub-ita-me-contro-te-il-film-operazione-spie-streaming-ita-d449b99b6612
https://medium.com/@shoyohinata352/cb01-hd-me-contro-te-il-film-operazione-spie-streaming-ita-b4d9a1448f52?postPublishedType=initial
https://medium.com/@shoyohinata352/films-cb01-me-contro-te-il-film-operazione-spie-streaming-ita-2024-in-altadefinizione-56a5129d0b34
https://medium.com/@shoyohinata352/guarda-me-contro-te-il-film-operazione-spie-film-intero-cb01-6a4c68790d0f
https://dojour.us/e/30214-guarda-me-contro-te-ii-film-operazione-spie-film-intero-cb01
https://matters.town/a/za4lio6p32r6?utm_source=share_copy&referral=husniada808
https://herbalmeds-forum.biolife.com.my/d/77415-guarda-me-contro-te-ii-film-operazione-spie-film-intero-cb01
https://hackmd.io/@Baymina21/rJJA3eNB0

heart cushion written pattern (continuation of my youtube tutorial!)

Hi everyone! Here's the written pattern for rounds 1-12 of my heart cushion cover. You can find the demonstration/steps for rounds 1-5 and how to read this pattern and make the stitches in my youtube tutorial.

Abbreviations: ch - chain / sc - single crochet / hdc - half double crochet / dc - double crochet / ss - slip stitch

Please note that the steps on ending each round and attaching a new color to your work (ss + ch 1) are explained with demonstrations in my youtube tutorial. I strongly recommend that you watch the full video before attempting to continue the rounds with this written pattern since I explain in detail how to make sense of the way it's written as I crochet each stitch in real time.

IMPORTANT: there are no mistakes in this pattern! Some people just haven't read the instructions correctly and I apologize to everyone that got confused by their comments. Please ignore them because I've successfully crocheted multiple projects (both pieces of the cushion, 2 bags of different sizes, wall hanging) following this exact pattern and never faced a problem with the stitches.

Round 1:

Slipknot, ch 8, dc into 3rd ch from your hook, 1 dc, 3 dc x 2, 1 dc, 4 dc, *now work on the other side of the ch*, in the same stitch as the previous 4 dc - 3 dc (total 7 dc in that stitch), dc 4 together, 6 dc, end the round and attach your next color (ss + ch 1)

Round 2:

2 hdc (in the same stitch as the ss from the previous round), 1 hdc x 4, 3 dc, 1 hdc x 4, 2 hdc x 2, 3 hdc x 2, 2 hdc, 1 sc, sc 2 together, 1 sc, 2 hdc, 3 hdc x 2, 2 hdc, end the round and attach your next color (ss + ch 1)

Round 3:

1 hdc x 7, 2 dc x 2, 1 hdc x 8, 2 hdc x 6, 1 sc x 2, sc 4 together, 1 sc x 2, 2 hdc x 6, 1 hdc, end the round and attach your next color (ss + ch 1)

Round 4:

1 hdc x 9, 3 dc, 1 hdc x 12, *2 hdc, 1 hdc* x 4, 2 sc, 1 sc x 2, sc 2 together, 1 sc x 2, 2 sc, *1hdc, 2 hdc* x 4, 1 hdc x 3, end the round and attach your next color (ss + ch 1)

Round 5:

1 hdc x 10, 2 dc x 2, 1 hdc x 13, *2 hdc, 1 hdc x 2* x 4, 2 sc, 1 sc, sc 4 together, 1 sc, 2 sc, *1 hdc x 2, 2 hdc* x 4, 1 hdc x 3, end the round and attach your next color (ss + ch 1)

Round 6: 

1 hdc x 12, 3 dc, 1 hdc x 15, *2 hdc, 1 hdc x 3* x 4, 2 sc, sc x 2, sc 2 together, sc x 2, 2 sc, *1 hdc x 3, 2 hdc* x 4, 1 hdc, end the round and attach your next color (ss + ch 1)

Round 7: 

1 hdc x 13, 2 dc x 2, 1 hdc x 13, *2 hdc, 1 hdc x 4* x 4, 2 sc, sc x 2, sc 4 together, sc x 2, 2 sc, *1 hdc x 4, 2 hdc* x 4, 1 hdc x 2, end the round and attach your next color (ss + ch 1)

Round 8:

1 hdc x 15, 3 dc, 1 hdc x 16, *2 hdc, 1 hdc x 5* x 4, 2 sc, sc x 2, sc 2 together, sc x 2, 2 sc, *1 hdc x 5, 2 hdc* x 4, 1 hdc, end the round and attach your next color (ss + ch 1)

Round 9:

1 hdc x 16, 2 dc x 2, 1 hdc x 17, *2 hdc, 1 hdc x 6* x 4, 2 sc, sc x 2, sc 2 together, sc x 2, 2 sc, *1 hdc x 6, 2 hdc* x 4, 1 hdc, end the round and attach your next color (ss + ch 1)

Round 10:

1 hdc x 18, 3 dc, 1 hdc x 19, *2 hdc, 1 hdc x 7* x 4, 2 sc, sc x 2, sc 2 together, sc x 2, 2 sc, *1 hdc x 7, 2 hdc* x 4, 1 hdc, end the round and attach your next color (ss + ch 1)

Round 11:

1 hdc x 19, 2 dc x 2, 1 hdc x 20, *2 hdc, 1 hdc x 8* x 4, 2 sc, sc x 2, sc 2 together, sc x 2, 2 sc, *1 hdc x 8, 2 hdc* x 4, 1 hdc, end the round and attach your next color (ss + ch 1)

Round 12:

1 hdc x 21, 3 dc, 1 hdc x 22, *2 hdc, 1 hdc x 9* x 4, 2 sc, sc x 2, sc 2 together, sc x 2, 2 sc, *1 hdc x 9, 2 hdc* x 4, 1 hdc, end the round and attach your next color (ss + ch 1)

If you want to do more than 12 rounds to make it bigger:

The lovely @bellamakesnz made an XL version of the heart pillow, you can follow her pattern for rounds 18-30 here: click me! 

OR End the rounds the same way (with ss + ch 1) then insert 1 hdc in each stitch around the heart. This will not affect the shape of your heart since you'll already have a base of rounds that give it the heart shape.

https://x.com/CB01MecontroTe
https://www.artstation.com/artwork/8b9gDQ
https://www.artstation.com/sub-ita-me-contro-te-il-film-operazione-spie-streaming-ita/profile
https://sub-ita-me-contro-te-ilfilm.tumblr.com
https://cb01-me-contro-te-il-film-intero.tumblr.com
https://cb01-hd-me-contro-te-il-film-ita.tumblr.com
https://me-contro-te-il-film-intero-cb01.tumblr.com
https://medium.com/@shoyohinata352/sub-ita-me-contro-te-il-film-operazione-spie-streaming-ita-d449b99b6612
https://medium.com/@shoyohinata352/cb01-hd-me-contro-te-il-film-operazione-spie-streaming-ita-b4d9a1448f52?postPublishedType=initial
https://medium.com/@shoyohinata352/films-cb01-me-contro-te-il-film-operazione-spie-streaming-ita-2024-in-altadefinizione-56a5129d0b34
https://medium.com/@shoyohinata352/guarda-me-contro-te-il-film-operazione-spie-film-intero-cb01-6a4c68790d0f
https://dojour.us/e/30214-guarda-me-contro-te-ii-film-operazione-spie-film-intero-cb01
https://matters.town/a/za4lio6p32r6?utm_source=share_copy&referral=husniada808
https://herbalmeds-forum.biolife.com.my/d/77415-guarda-me-contro-te-ii-film-operazione-spie-film-intero-cb01
https://hackmd.io/@Baymina21/rJJA3eNB0

To connect the 2 heart pieces together and make the cushion:

Ss both the pieces together. Please watch the youtube tutorial for this part!

Senin, 03 Juni 2024

diy crochet cake box (with frogs, frosting, and strawberries!) | pattern + video tutorial


Hi everyone! These are the written patterns for my YouTube tutorial. I highly recommend watching the video to better understand how to follow the patterns since this project is completely customizable and leaves room for you to come up with your own patterns. Lots of love as always <3

still loading...

how to crochet ANY iPad/laptop/kindle/book sleeve with pixel grid designs (step-by-step guide)

Hi everyone! As part of my in-depth youtube tutorial, here's a summary of how to design & crochet ANY sleeve for your ipad/laptop/kindle with pixel grids <3

Step 1: PLAN

Decide on which object you want to make the sleeve for and have a general idea about what pixel grid design you want to create. I've got a ton of designs and inspirations saved on this Pinterest board (I regularly update the board with new pieces I've found!).

Step 2: BACK PIECE

Crochet a plain back piece for your sleeve. To do this, start with a slip knot, then chain the same length as your object. Write down how many stitches (this is the width) and rows (this is the height) you made.

[ Optional step 1If you're making this sleeve for a thicker object, crochet a few extra rows to make up for the thickness before you start following the grid for the front piece. For example, ]

Step 3: PIXEL GRID

This is the site where I like creating my pixel grids (you could also use graph paper or draw on a blank pixel grid in Procreate). Head to 'generate' then 'alpha pattern'. Create your pixel grid according to the size of your back piece -> the number of stitches is the width and the number of rows is the height. Use pixel/fill mode to design the blank pixel grid!

[ Optional step 2: using the pixel grid you've created, for every row -> write down how many stitches there are for each color from left to right then right to left. This will create a pattern for your pixel grid that's easier to follow along than counting every stitch as you crochet it row-by-row ]

Step 4: FRONT PIECE

Use the 'carry on' or 'floating yarn' method to crochet using the pixel grid. These methods are shown in detail and with lots and lots of examples. So, please watch the clips in the video carefully to understand how to crochet using these methods. If you're using 2 colors, I recommend the 'carry on' method. But if you're using a much darker + lighter color or more than 2 colors, I recommend using the 'floating yarn' method. If you have a very dominant background in a light color and objects in just a specific part of the grid (like my Snoopy laptop sleeve), then I recommend using a mix of both methods like in the video.  

[ Optional step 3: it can be hard to show circular eyes/blush in pixel grid designs, so you could add these as separate pieces onto the front piece like I did in the video for my frog sleeve. To make circular pieces, start with a magic ring then insert single crochets into the ring till the circle is as big as you want ]

Step 5: JOINING THE PIECES

Fold your work in half so that the wrong sides of your pieces are facing outwards (towards you) and the right sides are facing inwards (folded against each other). Align the sides of your pieces, insert your hook through the edges of both the aligned pieces, then slip stitch the sides together.

[ Optional step 4: sew on some buttons or titch buttons as a closure/clasp for your sleeve ]

Fasten off and you're done!

Happy crocheting & lots of love as always,
Mahum


how to crochet easy bag charms - star, butterfly, & photocard holder (free patterns + video tutorial)


Hi everyone! These are the written patterns for my youtube tutorial. I'd love to see which one you'll make, tag me on instagram or tiktok @mahumcrochets

Mini star:

Make a magic ring (we're going to work in continuous circles so please use a stitch marker or bobby pin to mark the first stitch of each round, start the next round from the first stitch of the previous round)

Round 1 (total 5 st): insert 5 sc into the magic ring

Round 2 (total 10 st): insert 2 sc into every stitch

Round 3 (total 15 st): repeat *1 sc, 2 sc in the same stitch*

Round 4 (repeat to make 5 points of the star): insert in the same st *sc, hdc, dc, hdc, sc*, then ss into the next 2 stitches

Slightly bigger star:

Make a magic ring (we're going to work in continuous circles so please use a stitch marker or bobby pin to mark the first stitch of each round, start the next round from the first stitch of the previous round)

Round 1 (total 5 st): insert 5 sc into the magic ring

Round 2 (total 10 st): insert 2 sc into every stitch

Round 3 (total 15 st): repeat *1 sc, 2 sc in the same stitch*

Round 4 (total 20 st): repeat * 1 sc, 1sc, 2 sc in the same stitch*

Round 5 (repeat to make 5 points of the star): insert in the same st *sc, hdc, dc, hdc, sc*, then ss into the next 3 stitches 

Butterfly:

Make a magic ring, chain 3, insert a dc into the magic ring (this counts as your first cluster)

Repeat 7 times: chain 2, insert 2 dc into the magic ring

Chain 2 then slip stitch into the 3rd chain and fasten off

Attach the next color into the dc space (you can refer to the video tutorial to see which space I'm talking about!), start the following steps from the chain 2 space

In every chain 2 space: insert 6 double crochets

In every dc space: slip stitch

Slip stitch into the chain then chain 8

Fold the piece in half and wrap the chain around the center

Photocard holder:

Back piece - make a slip knot, chain the length of the width of your picture, crochet rows of single crochet till your piece is the same size as your picture, fasten off

Front piece - make a slip knot, chain the same number of chains that you did for the back piece, crochet 2-3 rows of single crochet (this is the bottom border), crochet rows (1 less than the total number of rows you need for the side border) consisting of 2-3 single crochet stitches (this is the first side border), fasten off the first side border, attach your yarn onto the other side, crochet rows consisting of the same number of single crochet stitches as the other side border (1 more row than the first side border to make the second side border), chain the difference to connect the second side border to the first, single crochet into the stitches of the first side border, crochet 2-3 rows of single crochet to make the top border (also work the stitches into the chains)

Slip stitch the front piece and back piece together

Happy crocheting & lots of love as always,
Mahum


Jumat, 31 Mei 2024

crochet rose top free pattern + video tutorial (made-to-measure with example size S/M pattern)


Hi everyone! This is a companion pattern for my youtube tutorial, it is not meant to be followed alone. It includes the measurements, stitch counts, and number of rounds that I did for my top. For reference, I'm a size S/M (in inches, upper bust: 32, bust: 34.5, waist: 27) and because I used double crochet stitches, my work has a slight stretch so I crocheted the length of my work 1-3 inches less than the measurements I took to accommodate the stretch for a more flattering fit. 

Please do not blindly follow this pattern or measurements here! This top is MADE-TO-MEASURE, meaning you should crochet it according to your specific measurements. Refer to the tutorial for explanations because this pattern is only for reference and example purposes to help you understand what I did for my top so that you can make your own. 

! You can find the yarns I used here on my amazon storefront !

Abbreviations & terminology

ss - slip stitch / sc - single crochet / dc - double crochet / tc - triple crochet / hdc - half double crochet

Body

Chain 115, ss into the first chain to form a round

*To start every roung: chain 2 / to end every round: ss into the chain 2

*Insert 1 dc in every stitch unless you're making an increase/decrease

Round 1 to 3: 1 dc in every stitch (no increases/decreases)

Round 4 to 7: crochet 4 increases in each round

Round 8 to 12: crochet 5 decreases in each round

Round 13 to 25: 1 dc in every stitch (no increases/decreases)

Please adjust this example pattern to fit your measurements, do not follow it blindly because this is custom-made-to-measure for my size!

Straps 

I made my straps as wide as 4 stitches. So, there are 4 dc in every row (chain 3 counts as a dc).

Row 1: attach yarn, chain 3 (this counts as your first dc), 1 dc in the next 3 stitches

Row 2 onwards: turn your work, chain 3 (this counts as your first dc), 1 dc in the next 2 stitches, 1 dc in the top 3rd chain, repeat

-> I did 15 rows in total

Rose

To make the rose bigger/smaller, only chain in multiples of 5. For example: 80, 95, 110, 250, etc.

Row 1: chain 101, insert 1 sc in the 2nd chain from your hook, insert 1 sc in every chain (total 100 sc stitches)

Row 2: turn your work, repeat *chain 5, skip 4 stitches, ss in the 5th stitch*

Row 3: repeat the following steps to make the petals...

- work in the chain space; sc, hdc, dc, 3 tc

- insert 1 tc in the 3rd sc stitch (please refer to video tutorial if you're confused)

- work in the same chain space: 3 tc, dc, hdc, sc

Fold the piece circularly in on itself to make the rose shape then sew it with a plastic needle to secure it. 

Ruffles

Row 1: chain 100, insert 1 dc into the 3rd chain from your hook, 2 dc in every chain

Row 2: turn your work, chain 2, insert 1 dc in every stitch

connect with me and share your work in our community by tagging me on instagram & tiktok @mahumcrochets - lots of love as always,

Mahum

Kamis, 30 Mei 2024

how to crochet cute bag charms (miffy, cat, & strawberries) | free patterns + video tutorial


Hi everyone! This is the companion pattern for my youtube tutorial.
I've included timestamps from the video so you can refer to video demonstrations if you're confused about a specific part. If you've never crocheted a plushie before, I also recommend taking the time to go through my guide to amigurumi video first which will help you understand how it works. 

Abbreviations & terminology

ss - slip stitch / sc - single crochet / increase - 2 sc in the SAME stitch / work in continuous rounds and use a stitch marker or bobby pin to mark the first stitch of every round


Miffy 

Part 1: Head (2:48 in video)

Start by making a magic ring...

Round 1 (total 8) - 8 sc

Round 2 (total 16) - 2 sc in every stitch

Round 3 (total 24) - 1 sc, increase

Round 4 (total 32) - 2 sc, increase

Round 5 (total 40) - 3 sc, increase

Round 6 to 8 (total 40) - 1 sc in every stitch

Round 9 (total 32) - 3 sc, decrease

Round 10 (total 24) - 2 sc, decrease

- Add the stuffing and embroider the face before closing your work

Round 11 (total 16) - 1 sc, decrease

Round 12 (total 8) - decrease in all the stitches

- ss together and fasten off

Part 2: Ears (13:38 in video)

Start by making a magic ring...

Round 1 (total 6) - 6 sc

Round 2 (total 9) - 1 sc, increase

Round 3 to 7 (total 9) - 1 sc in every stitch

- ss into the next stitch and fasten off / add stuffing and sew onto the head


Cat

Part 1: Head (18:08 in video)

Start by making a magic ring...

Round 1 (total 6) - 6 sc

Round 2 (total 12) - 2 sc in every stitch

Round 3 (total 18) - 1 sc, increase

Round 4 (total 24) - 2 sc, increase

Round 5 to 9 (total 24) - 1 sc in every stitch

Round 10 (total 18) - 2 sc, decrease

- Add the stuffing and embroider the face before closing your work

Round 11 (total 12) - 1 sc, decrease

Round 12 (total 6) - decrease in all the stitches

- ss together and fasten off

Part 2: Ears

Start by making a magic ring...

Round 1 (total 4) - 4 sc

Round 2 (total 8) - 2 sc in every stitch

Round 3 (total 8) - 1 sc in every stitch

- ss into the next stitch and fasten off / add stuffing and sew onto the head (if you're confused look at how I did miffy's ears in the video and follow the same steps)

Part 3: Hat (26:21 in video)

Start by making a magic ring...

Round 1 (total 6) - 6 sc

Round 2 (total 12) - 2 sc in every stitch

Round 3 (total 18) - 1 sc, increase

Round 4 (total 24) - 2 sc, increase

Round 5 (total 32) - 3 sc, increase

Round 6 and 7 (total 32) - 1 sc in every stitch

Round 8 - please refer to the video at 27:51

Optional Round 9 - 1 sc in every stitch

- ss in the next stitch and fasten off

Part 4: Leaves (31:53 in video)

Round 1 (total 5) - 5 sc

- Ss into the first stitch

Round 2 (repeat 5 times) - chain 2, ss into the 2nd chain, ss into the next stitch

- fasten off


Strawberries (big & small / 34:58 in video)

Start by making a magic ring...

Round 1 (total 6) - 6 sc

Round 2 (total 8) - 2 sc, increase

Round 3 (total 12) - 1 sc, increase *if you're making the big strawberry, skip to the additional rounds in pink below / if you're making the small strawberry, continue following the rounds in black below*

Round 4 and 5 (total 12) - 1 sc in every stitch

Round 6 (total 9) - 2 sc, decrease

FOLLOW THESE ROUNDS FOR THE BIG STRAWBERRY AFTER ROUND 3...

Round 4 (total 14) - 5 sc, increase

Round 5 (total 16) - 3 sc, increase, 6 sc, increase, 3 sc

Round 6 (total 16) - 1 sc in every stitch

Round 7 (total 12) - 2 sc, decrease

- ss in the next stitch and fasten off

Part 4: Leaves (41:56 in video)

Round 1 (total 6) - 6 sc

- Ss into the first stitch

Round 2 (repeat 6 times) - chain 3, ss into the 2nd chain, sc into the 3rd chain, ss into the next stitch

- fasten off and sew onto the strawberry after attaching the chain clasp

connect with me and share your work in our community by tagging me on instagram & tiktok @mahumcrochets - lots of love as always,

Mahum

how to crochet tulip book cover & sleeve | free pattern + video tutorial for beginner-friendly tulip stitch


Hi everyone! This is the companion pattern for my 
youtube tutorial. Please keep in mind that you can customize these patterns to make your piece ANY SIZE. Always refer to the video tutorial if you're confused for a clear demonstration.

ss - slip stitch / sc - single crochet / dc - double crochet

Book Cover

Front:

Chain a length that's the same as the width of your book (the total number of chains should be a multiple of 3 + 2)

Row 1 - skip the 1st chain then sc into every chain

Row 2 - chain 1, turn your work, sc into every stitch, change colours to green in the last sc

LEAVES Row 3 - chain 4, turn your work, dc into the 1st stitch, repeat *skip 2 stitches, dc into 3rd stitch, chain 2, dc in the same stitch*, change colours to pink in the last dc

TULIPS Row 4 - chain 2, repeat *insert a 5 dc cluster into every chain 2 space, chain 2*, change colors to white in the last cluster

Row 5 - chain 1, repeat *1 sc in every tulip stitch, 2 sc in every chain 2 space*

Row 6 - chain 1, turn your work, sc into every stitch

Row 7 onwards - repeat the steps for the leaves, tulips, and plain rows until the cover is the same size as your book

Border:

Attach your yarn in the right-hand bottom corner of the front pieces - ss along all 4 edges

Book spine:

Crochet rows of sc until the piece covers the spine of your book (do not chain 1 when starting a new row, simply turn your work and sc into the 1st stitch)

Back:

Crochet rows of dc until the piece covers the back of your book (do not chain 2 when starting a new row, simply turn your work and dc into the 1st stitch)

Clasps (do this on all 4 corners of your cover, work on the back side):

Attach your yarn with a knot, chain 3-4 (make sure it's tight), slip stitch to join back, fasten off


Sleeve (you can make this any size and use it for your laptop, ipad, book, etc)

Chain the length that you want (the total number of chains should be a multiple of 3)

Round 1 - Skip the 2 chains near your hook then dc into the 3rd chain, dc into every chain, insert 2 more dc in the last chain

Dc into the other side of the chains as well, insert 1 more dc into the last chain

The total number of dc stitches should be a multiple of 3 + 1, then ss into the chain 2

Round 2 - chain 2, dc into every stitch, insert hook into the chain 2 then change colours

LEAVES Round 3: chain 4, dc into the 1st stitch, repeat *skip 2 stitches, dc into 3rd stitch, chain 2, dc in the same stitch*, insert hook into the chain 4 then change colours

TULIPS Round 4: chain 2, repeat *insert a 3 dc cluster into every chain 2 space, chain 2*, insert hook into the chain 2 then change colours

Round 5 - chain 2, repeat *1 dc in every tulip stitch, 2 dc in every chain 2 space*, ss into chain 2

Round 6 - chain 2, dc in every stitch

Round 7 onwards - repeat the steps for the leaves, tulips, and plain rounds until the sleeve is the size you want

Optional: sew on buttons and crochet clasps like the demonstration in the video

connect with me and share your work in our community by tagging me on instagram & tiktok @mahumcrochets - lots of love as always,

Mahum

Selasa, 28 Mei 2024

100+ FREE cute pixel grids with in-depth crochet youtube tutorial

Hi everyone! These are the grids I used during my demonstrations of the floating yarn technique in my pixel grid crochet youtube tutorial

100+ FREE pixel grids are on my Pinterest too here <3

Grid 1: Bear with miffy (view written pattern)


Grid 2: Cat with frog hat (I'll upload the written pattern soon here)


connect with me and share your work in our community by tagging me on instagram & tiktok @mahumcrochets - lots of love as always,

Mahum

Senin, 27 Mei 2024

taylor swift's folklore-inspired crochet bag | free pattern + video tutorial


Hi everyone! These are the reference notes for my folklore-inspired bag featured in episode 2 of my new bags series. Please refer to the youtube tutorial for a demonstration and in-depth explanations of front post/back post stitches.

Abbreviations/terminology

dc - double crochet / fptc - front post triple crochet / bpdc - back post double crochet

Front piece

Make a slip knot, chain 35, skip 3 chains (these 3 chains count as 1 dc), dc into the 4th chain, dc into every chain (total 33 dc stitches including the chain 3)

- To start a new row: always chain 1 & turn your work, then dc into the 1st stitch NOT the chain 1

Right/front side

Dc 2, 6 fptc (456123), dc 11, 4 fptc (3412), dc 2, 6 fptc (456123), dc 2

Wrong/back side

Dc 2, 6 bpdc (123456), dc 2, 4 bpdc (1234), dc 11, 6 bpdc (123456), dc 2


Minggu, 26 Mei 2024

cute crochet tapestry ideas (free pixel grids + written patterns)


Hi everyone! Included in this post are the pixel grids I used to crochet the tapestries featured in my new series - easy wall decor on youtube. As a reminder, you can learn how to crochet with pixel grids with my "how to crochet ANY pixel grid" youtube tutorial. Happy crocheting <3

Save $ when you purchase this tapestry patterns bundle! 

1. Boris & Miffy (written pattern is available here: https://ko-fi.com/s/f2d7f9b6f0)


2. Black cat (written pattern is available here: https://ko-fi.com/s/58555740d1)


3. Duotone bow (written pattern is available here: https://ko-fi.com/s/3349128883)


tulips in a pot bag charm inspired by harry styles (free crochet pattern + video tutorial)

Hi everyone! This is the written pattern for your reference as seen in my youtube tutorial. Please refer to the tutorial for demonstrations on how to attach the pieces together. Harry's house tote bag tutorial is also on my channel!

Abbreviations:

ss - slip stitch / sc - single crochet / hdc - half double crochet / dc - double crochet


Part 1: Tulip

Make a magic circle and chain 1

[ Always mark the 1st sc of every round with a stitch marker or bobby pin! ]

Round 1 - 6 sc into the magic circle

Round 2 - 2 sc in every stitch (total 12)

Round 3 to 6 - 1 sc in every stitch (total 12 in each round)

Ss into the marked stitch and fasten off

Part 2: Stem & leaves

Make a slip knot and chain 16

Skip the 1st chain and follow the pattern below from the 2nd chain onwards...

Sc, hdc, dc x 2, sc, ss, fasten off

Part 3: Pot

Make a magic circle and chain 1

[ Always mark the 1st sc of every round with a stitch marker or bobby pin! ]

Round 1 - 8 sc into the magic circle

Round 2 - 2 sc in every stitch (total 16)

Round 3 - 1 sc in the back loops only (total 16)

Round 4 to 7 - 1 sc in every stitch (total 16 stitches in every round)

Ss into the marked stitch and fasten off

Optional - embroider patterns onto the pot

Part 4: Soil

Make a magic circle and chain 1

[ Always mark the 1st sc of every round with a stitch marker or bobby pin! ]

Round 1 - 8 sc into the magic circle

Round 2 - 2 sc in every stitch (total 16)

Ss into the marked stitch and fasten off

Part 5: Chain hanging

Make a slip knot and chain the length you want for the hanging (I did 32 chains)

Fasten off and attach into the centre of the magic circle of the pot

Happy crocheting & lots of love as always,

Mahum

Sabtu, 25 Mei 2024

nature-themed crochet room decor: garlands, hammock, & hanging plant pot (written patterns + video tutorial)


Hi everyone! Here are the written patterns for some nature-themed crochet pieces. As a reminder, please make sure to watch the youtube tutorial before attempting to follow the pattern because the format is a bit different than usual. 

1. Pot

Make a magic ring and chain 1

Round 1 - 8 sc

Round 2 - 2 sc in every stitch (total 16)

Round 3 - 1 sc, increase (total 24)

Round 4 - 2 sc, increase (total 32)

Round 5 - 3 sc, increase (total 40)

Round 6 - 4 sc, increase (total 48)

Round 7 - 1 sc in every stitch, work in the back loops only (total 48)

Round 8 to 18 - 1 sc in every stitch (total 48)

NOTE: To make the soil, do the same steps from round 1 to 6

2. Small leaf branches

Make a slip knot and chain 4

First leaf - 2 dc into the 3rd chain from your hook, chain 2 picot, 2 dc into the same chain, chain 2, ss into the same chain, ss into the next chain

Chain any number for the stem (I chain 5 after every leaf)

Second leaf onwards - chain 3 more for the leaf, 2 dc into the 3rd chain from your hook, chain 2 picot, 2 dc into the same chain, chain 2, ss into the same chain, ss into the next chain

Chain any number for the stem and repeat

3. Large leaf branches

Make a slip knot and chain 9

First leaf - sc into the 2nd chain from your hook, hdc, dc, 2 dc, dc, hdc, sc...

...chain 2 then work on the other side of the chains, sc, hdc, dc, 2 dc, dc, hdc, sc, chain 2, ss down the centre of the leaf, ss into the chain 2, ss into the stem chain

Chain any number for the stem (I chain 8 after every leaf)

Second leaf onwards: chain 8, sc into the 2nd chain from your hook, hdc, dc, 2 dc, dc, hdc, sc... 

...chain 2 then work on the other side of the chains, sc, hdc, dc, 2 dc, dc, hdc, sc, chain 2, ss down the centre of the leaf, ss into the chain 2, ss into the stem chain

Chain any number for the stem and repeat

4. Ruffle leaf branches

Make a slip knot then chain the length you want (I recommend at least 80-100)

Chain 2 more then dc into the 3rd chain from your hook

Row 1 - 2 dc into every chain

Row 2 - chain 2 and turn your work to start this next row, 1 dc into every stitch

5. Small flowers

First petal: Make a magic circle and chain 2, 1 dc, chain 2 then ss into the magic circle

Repeat 4 more times: chain 2, 1 dc, chain 2 then ss into the magic circle

6. Medium flowers

Make a magic circle and chain 1

Round 1 - 10 sc

Repeat 5 times (petals): chain 1 and hdc + dc in the same stitch, dc + hdc, chain 1 & ss in the next stitch

7. Large flowers

Make a magic circle and chain 1

Round 1 - 6 sc

Round 2 - 2 sc in every stitch (total 12)

Repeat 5 times (petals): chain 3, 4 tc in the same stitch, chain 3 then ss into the next stitch

8. Hammock (for holding yarns/plushies)

Make a slipknot and chain 6, ss into the first chain, chain 4

Work into the space formed between the chains: 1 dc, chain 2, 1 dc

Next row onwards: chain 4 and turn your work, 1 dc into every chain space and chain 2 after every dc, 1 dc into the 2nd chain at the end of the row

Jumat, 24 Mei 2024

how to crochet flower bookmarks (lily of the valley & mini bouquet) | free patterns + video tutorial


Hi everyone! These are the written patterns for my youtube tutorial. Please use these written instructions for reference, but watch the demonstrations in the video first to understand how to follow the steps. This is a scrap-yarn-friendly project so you don't need a lot of yarn for these bookmarks :)

1. Lily of the valley bookmark that looks like it's growing out of the book

How to crochet the bell-shaped flower:

Make a magic ring and chain 1

Round 1 - 5 sc, ss into the 1st stitch to end the round

Round 2 - chain 1 to start the round, insert 2 sc in every stitch (total 10 stitches), ss into the 1st stitch to end the round

Round 3, 4, and 5 - chain 1 to start the round, insert 1 sc in every stitch (total 10 stitches), ss into the 1st stitch to end the round

Round 6 (petals) - repeat 5 times...in the same stitch *ss, sc, hdc*, in the next stitch *hdc, sc, ss*

To end your work, chain 1 and fasten off.

How to crochet the bottom leaves (optional):

Make a magic ring and chain 1

Round 1 - 4 sc, ss into the 1st stitch to end the round

Round 2 - repeat 4 times...chain 3, skip the 1st chain, ss into the 2nd chain, sc into the 3rd chain, ss into the next stitch

To end your work, chain 1 and fasten off.

How to crochet the stem and leaves:

Make a slip knot and chain the length you want for the bookmark. Chain 4-8 more to make the stem for the 1st flower. Turn the chains to the back side, skip the 1st chain, then ss into the middle loops of those chains. 

Chain 6-10 more to make the stem for the 2nd flower. Turn the chains to the back side, skip the 1st chain, then ss into the middle loops of the chains all the way down. 

When you want to make a leaf, chain 3, skip the 1st chain, ss into the 2nd chain, sc into the 3rd chain, then continue ss into the middle loop of the chains.

To end your work, chain 1 and fasten off.

Sew the pieces together and you're done!

2. Flower bouquet bookmark that looks like pressed flowers

How to crochet forget-me-not flowers:

Make a magic ring and chain 1

Round 1 - 5 sc, ss into the 1st stitch with the colour of the petals to end the round

Round 2 (petals) - repeat 5 times...*chain 3, 2 dc in the same stitch, ss into the same stitch*

To end your work, chain 1 and fasten off.

How to crochet the stem and leaves:

Make a slip knot and chain the length you want for the stem (make it slightly longer with 4-6 extra chains because the length will shrink a bit). Turn the chains to the back side, skip the 1st chain, then ss into the middle loops of the chains. 

When you want to make a leaf, chain 5, skip the 1st chain, ss into the 2nd chain, sc into the 3rd chain, hdc into the 4th chain, sc into the 5th chain, then continue ss into the middle loop of the chains.

To end your work, chain 1 and fasten off.

Sew the stem onto the back side of the flower and you're done!


heart granny square tote bag tutorial (beginner friendly)

Free, easy, and beginner friendly crochet pattern and tutorial for a Pinterest inspired crochet tote bag

Hi everyone! Here's a cute and easy tote bag tutorial that follows a repetitive pattern, requires minimal effort to create alternating rows, and is easily put together.

Here are a few things to keep in mind while using this pattern:

The heart granny square is not my original idea! With this pattern, I'm only taking credit for the way in which I crocheted the heart granny square into a tote bag. All the steps I took are either mentioned explicitly or linked to a specific technique or youtube tutorial I used. To make this, you should be experienced with some basic stitches and know how granny squares work. That being said, I can't wait to see what you come up with! Please tag me in your creations (or send me a picture!) and feel free to DM me on Instagram (@mahumcrochets) if you have any questions.

Materials & Terminology:

I used a 4.5 mm hook and around 100 g of 2 colors (I recommend using light and dark alternating colors!). Abbreviations: SC - single crochet, DC - double crochet, HDC - half double crochet, TC - triple crochet, SS - slip stitch, CH - chain, C1 - color 1, C2 - color 2.

A note on the instructions before you begin: This tote bag follows a technique that's VERY similar to my emma book cover pattern. If you've already crocheted that then you can skip ahead. I've also included some additional instructions in brackets for beginners, hopefully, those make things a bit clearer!

Part 1: Crocheting a heart granny square

Crochet a heart following this youtube tutorial: crochet heart granny square tutorial. Once you're done crocheting the heart, you can either keep following the video (don't forget to refer back to this pattern for the steps that come afterward) to make the granny square or follow the pattern below.

Border 1 (C1): Attach the new yarn color with a knot at the bottom of the heart. Work in the back loops ONLY.

Follow this pattern as you go around the stitches of the heart (don't skip any stitch):

Sc, hdc, dc, tc, ch 2 (this is the 1st gap), dc, hdc, sc, sc, sc, sc, ch 2 (this is the 2nd gap), sc, sc, sc, sc, hdc, sc, sc, sc, sc, ch 2 (this is the 3rd gap), sc, sc, sc, sc, hdc, dc, ch 2 (this is the 4th gap), tc, dc, hdc, sc into the stitch where you attached the yarn, ss into the next stitch.

Border 2 (C1): After you ss, ch 3 and in the same stitch and insert 2 dc (the ch 3 counts as your first dc so there are basically 3 dc in the stitch), ch 1, now make a CORNER by doing the steps in asterisks in the ch 2 gap closest to you: *3 dc into the ch 2 gap, ch 2, 3 dc into the same ch 2 gap*, ch 1, 3 dc into the 3rd stitch from the ch 2 gap, ch 1, CORNER *3 dc into the ch 2 gap, ch 2, 3 dc into the same ch 2 gap*, ch 1, 3 dc into the 3rd stitch from the ch 2 gap, ch 1, CORNER *3 dc into the ch 2 gap, ch 2, 3 dc into the same ch 2 gap*, ch 1, 3 dc into the 3rd stitch from the ch 2 gap, ch 1, CORNER *3 dc into the ch 2 gap, ch 2, 3 dc into the same ch 2 gap*, ch 1, ss into the top of the ch 3 you made at the start, ch 1 to fasten off and cut.

Border 3 (C2): Attach the new color with a knot into one of the ch 2 gaps made in border 2. Ch 3 and insert 2 dc in the same stitch (the ch 3 counts as your first dc so there are basically 3 dc in the stitch where you attached the yarn), ch 1. Now you'll be working into the gaps made either by ch 1 or ch 2 in border 2. Repeat *3 dc, ch 1* in every chain 1 gap. When you reach every chain 2 gap, repeat *3 dc, ch 2, 3 dc* to make a corner. Do this all around the square. When you reach the same chain 2 gap where you attached the yarn, insert 3 dc again, ch 2, ss into the top of the ch 3, and ch 1 to fasten off and cut the yarn to tighten. 

Borders 4 & 5 (C1): Attach the new color with a knot into one of the ch 2 gaps made in border 2. Ch 3 and insert 2 dc in the same stitch (the ch 3 counts as your first dc so there are basically 3 dc in the stitch where you attached the yarn), ch 1. Repeat *3 dc, ch 1* in every ch 1 gap. When you reach every ch 2 gap, repeat *3 dc, ch 2, 3 dc* to make a corner. Do this all around the square. 

When you reach the same chain 2 gap where you attached the yarn, insert 3 dc again, ch 2, ss into the top of the ch 3, DO NOT FASTEN OFF, turn your work, ss into the ch 2 gap (this is where border 5 starts), ch 3 and insert 2 dc in the same stitch, repeat the same steps as before to complete the border. 

Continue adding the borders by alternating between 1 row of C2 (steps from border 3) and 2 rows of C1 (steps from borders 4 & 5). Crochet 2 squares of the same size.

Once the squares are as big as you want, attach the alternating color in the ch 2 gap in the top corner, repeat *3 dc, ch 1* till the end. This will give your bag a more rectangular, tote bag-like shape.

free crochet pattern and easy tutorial on how to crochet a heart granny square tote bag

Part 2: Crocheting the straps

For the straps, start with a slip knot, ch 6 (or more if you want your strap to be wider), sc into the 2nd ch from your hook, sc in every stitch till the end (total 5 sc), ch 1, turn your work, sc into the 2nd ch from your hook, sc in every stitch till the end (total 5 sc again), continue crocheting rows of sc until it's the length you want for the strap.

Make 2 straps of the same width and length.


Part 3: Putting the pieces together

This part is up to personal preference! You can sew the 2 sides of the bag and the straps together or crochet with ss/sc (I prefer crocheting).

To attach the straps to the squares, I used ss. Attach the yarn with a knot on the wrong side of your square (the side our loose ends face) then ss the stitches of the strap and square together. 

To attach the squares together, I used the same yarn color that I used at the top to give it a rectangular shape. Then I sc in every stitch around the sides. This technique gave me an alternating color border around my bag without increasing its size.

And you're done!

I hope you found this pattern helpful, I'm still in the process of learning and trying to navigate the crochet community, so I'd love feedback from you! Please let me know what could've been improved or just your general thoughts on the pattern. I can't wait to see what you all create, don't forget to tag me on Instagram, and happy crocheting!