Tampilkan postingan dengan label crochet bags. Tampilkan semua postingan

Rabu, 05 Juni 2024

how to crochet a heart bag & keychain with wings | pattern + video tutorial


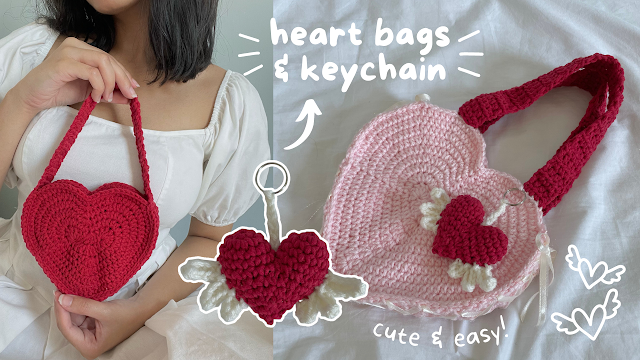
Hi everyone, today starts the beginning of my valentine's day pattern/tutorial collection! We're starting with a cute accessory to wear with your outfits - a heart-shaped bag* and an adorable little key chain.

Before following the pattern, I highly recommend watching the video tutorial. If you're confused at any point on how to follow the pattern, I explain with demonstrations in that tutorial!

Abbreviations used:
ch - chain / sc - single crochet / ss - slip stitch / hdc - half double crochet / dc - double crochet

Pattern explanations:
If the number comes before the stitch name - insert that number into the same stitch. Eg. 2 hdc means that you have to insert 2 hdc into the same stitch.
If the number comes after the stitch name - insert that stitch into the next 'number' stitches. Eg. 1 sc x 3 means that you have to insert 1 sc into the next 3 stitches.
More examples - 
2 dc x 2 means that you have to insert 2 dc (into the same stitch) for the next 2 stitches.
1 hdc x 6 means that you have to insert 1 hdc into the next 6 stitches.

Please note: if you're confused during any of the steps, you can refer to my youtube tutorial here.

Part 1 - Heart pieces for the bag (end each round by slip stitching into the 1st stitch of the round, start each round by inserting the first stitch of that round into the same stitch where you slip stitched / total stitch counts for each round is included in the bracket)

Round 1 (23):

Start with a slipknot, ch 8, 1 dc into 3rd ch from your hook, 1 dc, 3 dc x 2, 1 dc, 4 dc, *now work on the other side of the ch*, in the same stitch as the previous 4 dc - insert 3 dc (total 7 dc in that ch), dc 4 together, 6 dc, ss into the first stitch of the round (do this to end EVERY round)

Round 2 (38):

2 hdc (into the same stitch as the ss from the previous round, start EVERY round by inserting the first stitch into the same stitch as the ss), 1 hdc x 4, 3 dc, 1 hdc x 4, 2 hdc x 2, 3 hdc x 2, 2 hdc, 1 sc, sc 2 together, 1 sc, 2 hdc, 3 hdc x 2, 2 hdc

Round 3 (49):

1 hdc x 7, 2 dc x 2, 1 hdc x 8, 2 hdc x 6, 1 sc x 2, sc 4 together, 1 sc x 2, 2 hdc x 6, 1 hdc

Round 4 (60):

1 hdc x 9, 3 dc, 1 hdc x 12, *2 hdc, 1 hdc* x 4, 2 sc, 1 sc x 2, sc 2 together, 1 sc x 2, 2 sc, *1hdc, 2 hdc* x 4, 1 hdc x 3

Round 5 (69):

1 hdc x 10, 2 dc x 2, 1 hdc x 13, *2 hdc, 1 hdc, 1 hdc* x 4, 2 sc, 1 sc, sc 4 together, 1 sc, 2 sc, *1 hdc, 1 hdc, 2 hdc* x 4, 1 hdc x 3

Round 6 (80): 

1 hdc x 12, 3 dc, 1 hdc x 15, *2 hdc, 1 hdc x 3* x 4, 2 sc, 1 sc x 2, sc 2 together, 1 sc x 2, 2 sc, *1 hdc x 3, 2 hdc* x 4, 1 hdc

Round 7 (89): 

1 hdc x 13, 2 dc x 2, 1 hdc x 13, *2 hdc, 1 hdc x 4* x 4, 2 sc, 1 sc x 2, sc 4 together, 1 sc x 2, 2 sc, *1 hdc x 4, 2 hdc* x 4, 1 hdc x 2

Round 8 (100):

1 hdc x 15, 3 dc, 1 hdc x 16, *2 hdc, 1 hdc x 5* x 4, 2 sc, 1 sc x 2, sc 2 together, 1 sc x 2, 2 sc, *1 hdc x 5, 2 hdc* x 4, 1 hdc

Round 9 (111):

1 hdc x 16, 2 dc x 2, 1 hdc x 17, *2 hdc, 1 hdc x 6* x 4, 2 sc, 1 sc x 2, sc 2 together, 1 sc x 2, 2 sc, *1 hdc x 6, 2 hdc* x 4, 1 hdc

Round 10 (122):

1 hdc x 18, 3 dc, 1 hdc x 19, *2 hdc, 1 hdc x 7* x 4, 2 sc, 1 sc x 2, sc 2 together, 1 sc x 2, 2 sc, *1 hdc x 7, 2 hdc* x 4, 1 hdc

Round 11 (133):

1 hdc x 19, 2 dc x 2, 1 hdc x 20, *2 hdc, 1 hdc x 8* x 4, 2 sc, 1 sc x 2, sc 2 together, 1 sc x 2, 2 sc, *1 hdc x 8, 2 hdc* x 4, 1 hdc

Round 12 (144):

1 hdc x 21, 3 dc, 1 hdc x 22, *2 hdc, 1 hdc x 9* x 4, 2 sc, 1 sc x 2, sc 2 together, 1 sc x 2, 2 sc, *1 hdc x 9, 2 hdc* x 4, 1 hdc

If you want to do more than 12 rounds to make it bigger:

End the rounds the same way then insert 1 hdc in each stitch around the heart. This will not affect the shape of your heart since you'll already have a base of rounds that give it the heart shape.

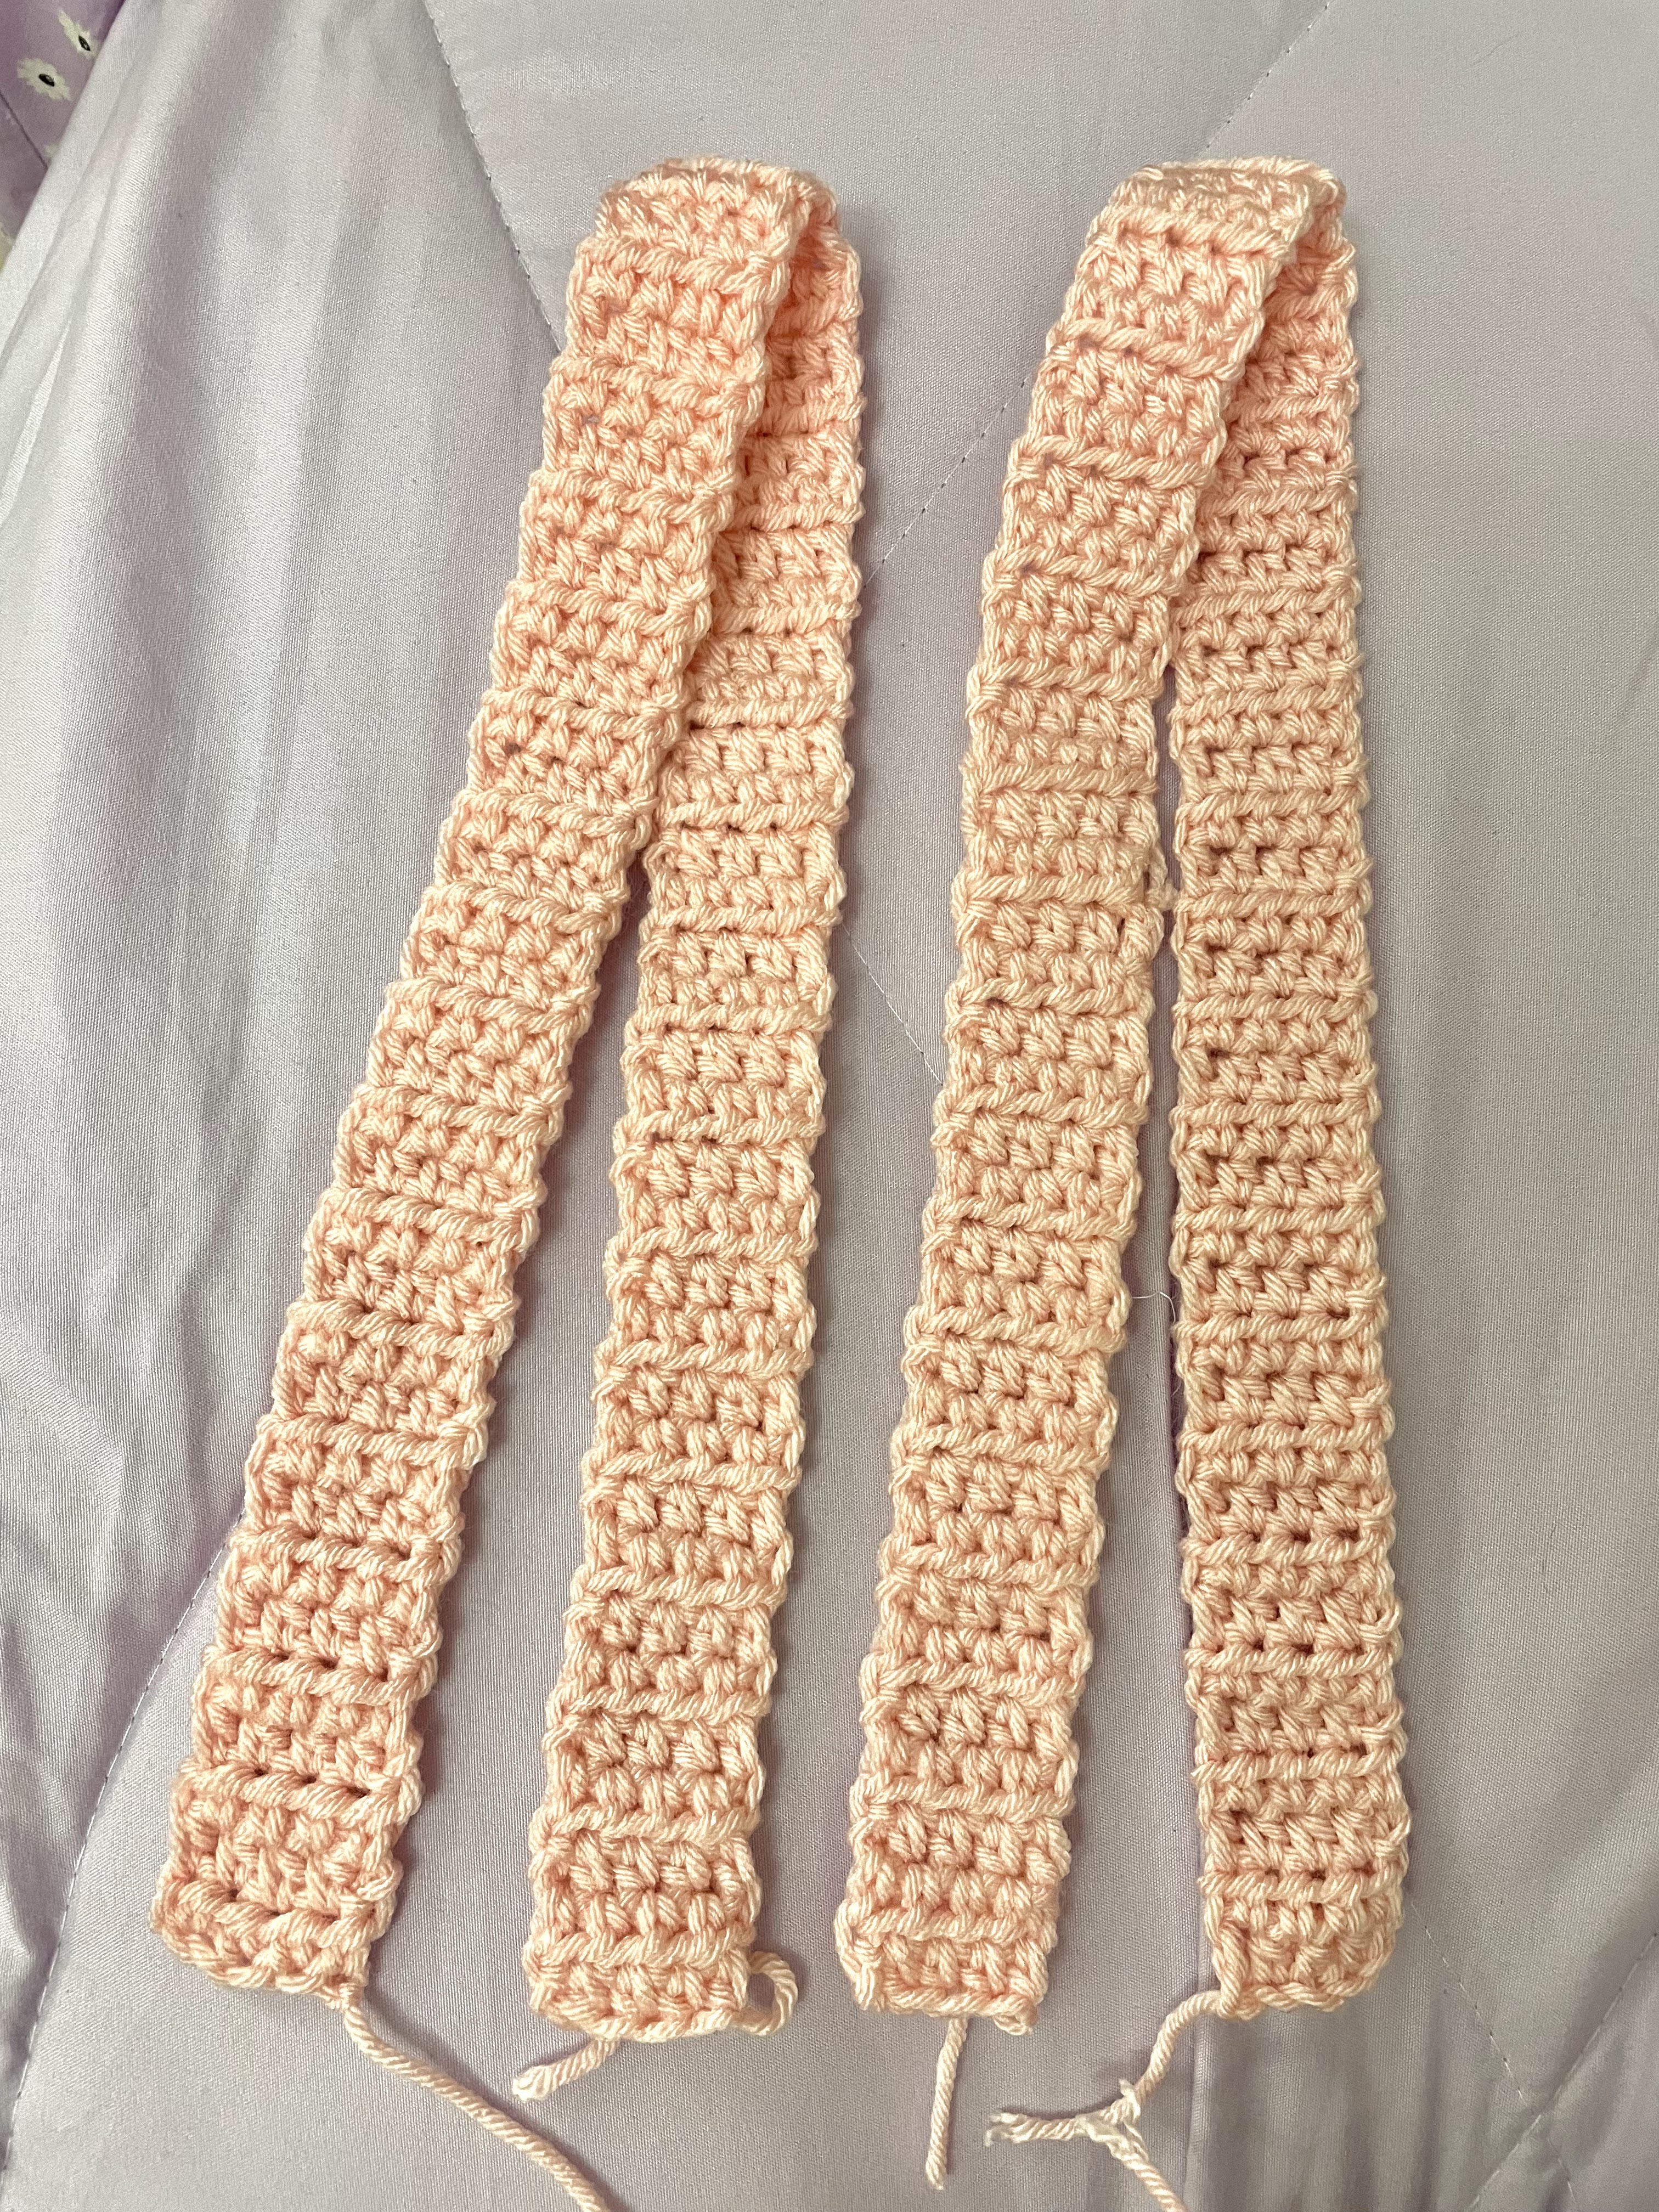
Part 2: Strap pieces

For this step, the width and length are completely up to you! You can also use any stitch (I recommend using sc or hdc since dc would be looser and stretchier). If you want a thicker/wider strap, do more chains at the beginning. If you want a longer strap, do more rows. 

Part 3: Heart keychain

To crochet the heart piece, I followed this class on Skillshare - How to Crochet a Heart by Breanna Presley. Since the pattern belongs to that creator, I can't share it for free here. But because my recent YouTube video is sponsored by Skillshare, you can access the class to make the keychain using the 1-month free membership here (as well as a lot of other classes too!).

Right side (the wing starts from the bottom up) - Attach yarn onto the bottom side of the heart, ch 4, sc into the 2nd ch from your hook, 1 hdc x 2, ss into the side of the heart, ch 5, sc into the 2nd ch from your hook, 1 hdc x 3, ss into the side of the heart, ch 6, sc into the 2nd ch from your hook, 1 hdc x 4, ss into the side of the heart, fasten off.

Left side (the wing starts from the top down)Attach yarn onto the top side of the heart, ch 6, sc into the 2nd ch from your hook, 1 hdc x 4, ss into the side of the heart, ch 5, sc into the 2nd ch from your hook, 1 hdc x 3, ss into the side of the heart, ch 4, sc into the 2nd ch from your hook, 1 hdc x 2, ss into the side of the heart, fasten off.

*Disclaimer: This heart-shaped bag is based solely on my heart cushion tutorial and follows the same pattern for rounds 1-12. 

Senin, 03 Juni 2024

how to crochet easy bag charms - star, butterfly, & photocard holder (free patterns + video tutorial)


Hi everyone! These are the written patterns for my youtube tutorial. I'd love to see which one you'll make, tag me on instagram or tiktok @mahumcrochets

Mini star:

Make a magic ring (we're going to work in continuous circles so please use a stitch marker or bobby pin to mark the first stitch of each round, start the next round from the first stitch of the previous round)

Round 1 (total 5 st): insert 5 sc into the magic ring

Round 2 (total 10 st): insert 2 sc into every stitch

Round 3 (total 15 st): repeat *1 sc, 2 sc in the same stitch*

Round 4 (repeat to make 5 points of the star): insert in the same st *sc, hdc, dc, hdc, sc*, then ss into the next 2 stitches

Slightly bigger star:

Make a magic ring (we're going to work in continuous circles so please use a stitch marker or bobby pin to mark the first stitch of each round, start the next round from the first stitch of the previous round)

Round 1 (total 5 st): insert 5 sc into the magic ring

Round 2 (total 10 st): insert 2 sc into every stitch

Round 3 (total 15 st): repeat *1 sc, 2 sc in the same stitch*

Round 4 (total 20 st): repeat * 1 sc, 1sc, 2 sc in the same stitch*

Round 5 (repeat to make 5 points of the star): insert in the same st *sc, hdc, dc, hdc, sc*, then ss into the next 3 stitches 

Butterfly:

Make a magic ring, chain 3, insert a dc into the magic ring (this counts as your first cluster)

Repeat 7 times: chain 2, insert 2 dc into the magic ring

Chain 2 then slip stitch into the 3rd chain and fasten off

Attach the next color into the dc space (you can refer to the video tutorial to see which space I'm talking about!), start the following steps from the chain 2 space

In every chain 2 space: insert 6 double crochets

In every dc space: slip stitch

Slip stitch into the chain then chain 8

Fold the piece in half and wrap the chain around the center

Photocard holder:

Back piece - make a slip knot, chain the length of the width of your picture, crochet rows of single crochet till your piece is the same size as your picture, fasten off

Front piece - make a slip knot, chain the same number of chains that you did for the back piece, crochet 2-3 rows of single crochet (this is the bottom border), crochet rows (1 less than the total number of rows you need for the side border) consisting of 2-3 single crochet stitches (this is the first side border), fasten off the first side border, attach your yarn onto the other side, crochet rows consisting of the same number of single crochet stitches as the other side border (1 more row than the first side border to make the second side border), chain the difference to connect the second side border to the first, single crochet into the stitches of the first side border, crochet 2-3 rows of single crochet to make the top border (also work the stitches into the chains)

Slip stitch the front piece and back piece together

Happy crocheting & lots of love as always,
Mahum


Kamis, 30 Mei 2024

how to crochet cute bag charms (miffy, cat, & strawberries) | free patterns + video tutorial


Hi everyone! This is the companion pattern for my youtube tutorial.
I've included timestamps from the video so you can refer to video demonstrations if you're confused about a specific part. If you've never crocheted a plushie before, I also recommend taking the time to go through my guide to amigurumi video first which will help you understand how it works. 

Abbreviations & terminology

ss - slip stitch / sc - single crochet / increase - 2 sc in the SAME stitch / work in continuous rounds and use a stitch marker or bobby pin to mark the first stitch of every round


Miffy 

Part 1: Head (2:48 in video)

Start by making a magic ring...

Round 1 (total 8) - 8 sc

Round 2 (total 16) - 2 sc in every stitch

Round 3 (total 24) - 1 sc, increase

Round 4 (total 32) - 2 sc, increase

Round 5 (total 40) - 3 sc, increase

Round 6 to 8 (total 40) - 1 sc in every stitch

Round 9 (total 32) - 3 sc, decrease

Round 10 (total 24) - 2 sc, decrease

- Add the stuffing and embroider the face before closing your work

Round 11 (total 16) - 1 sc, decrease

Round 12 (total 8) - decrease in all the stitches

- ss together and fasten off

Part 2: Ears (13:38 in video)

Start by making a magic ring...

Round 1 (total 6) - 6 sc

Round 2 (total 9) - 1 sc, increase

Round 3 to 7 (total 9) - 1 sc in every stitch

- ss into the next stitch and fasten off / add stuffing and sew onto the head


Cat

Part 1: Head (18:08 in video)

Start by making a magic ring...

Round 1 (total 6) - 6 sc

Round 2 (total 12) - 2 sc in every stitch

Round 3 (total 18) - 1 sc, increase

Round 4 (total 24) - 2 sc, increase

Round 5 to 9 (total 24) - 1 sc in every stitch

Round 10 (total 18) - 2 sc, decrease

- Add the stuffing and embroider the face before closing your work

Round 11 (total 12) - 1 sc, decrease

Round 12 (total 6) - decrease in all the stitches

- ss together and fasten off

Part 2: Ears

Start by making a magic ring...

Round 1 (total 4) - 4 sc

Round 2 (total 8) - 2 sc in every stitch

Round 3 (total 8) - 1 sc in every stitch

- ss into the next stitch and fasten off / add stuffing and sew onto the head (if you're confused look at how I did miffy's ears in the video and follow the same steps)

Part 3: Hat (26:21 in video)

Start by making a magic ring...

Round 1 (total 6) - 6 sc

Round 2 (total 12) - 2 sc in every stitch

Round 3 (total 18) - 1 sc, increase

Round 4 (total 24) - 2 sc, increase

Round 5 (total 32) - 3 sc, increase

Round 6 and 7 (total 32) - 1 sc in every stitch

Round 8 - please refer to the video at 27:51

Optional Round 9 - 1 sc in every stitch

- ss in the next stitch and fasten off

Part 4: Leaves (31:53 in video)

Round 1 (total 5) - 5 sc

- Ss into the first stitch

Round 2 (repeat 5 times) - chain 2, ss into the 2nd chain, ss into the next stitch

- fasten off


Strawberries (big & small / 34:58 in video)

Start by making a magic ring...

Round 1 (total 6) - 6 sc

Round 2 (total 8) - 2 sc, increase

Round 3 (total 12) - 1 sc, increase *if you're making the big strawberry, skip to the additional rounds in pink below / if you're making the small strawberry, continue following the rounds in black below*

Round 4 and 5 (total 12) - 1 sc in every stitch

Round 6 (total 9) - 2 sc, decrease

FOLLOW THESE ROUNDS FOR THE BIG STRAWBERRY AFTER ROUND 3...

Round 4 (total 14) - 5 sc, increase

Round 5 (total 16) - 3 sc, increase, 6 sc, increase, 3 sc

Round 6 (total 16) - 1 sc in every stitch

Round 7 (total 12) - 2 sc, decrease

- ss in the next stitch and fasten off

Part 4: Leaves (41:56 in video)

Round 1 (total 6) - 6 sc

- Ss into the first stitch

Round 2 (repeat 6 times) - chain 3, ss into the 2nd chain, sc into the 3rd chain, ss into the next stitch

- fasten off and sew onto the strawberry after attaching the chain clasp

connect with me and share your work in our community by tagging me on instagram & tiktok @mahumcrochets - lots of love as always,

Mahum

Senin, 27 Mei 2024

crochet harry's house tote bag: free pixel grid!

Hi everyone! In my newest crochet bags series (watch episode 1 here!), I crocheted a harry's house tote bag. You can find the free pixel grid I used to make the front piece below (as well as a link to save it on Pinterest). You can turn this pixel grid into a wall tapestry, cushion cover, or bag! Please refer to the youtube tutorial to see how I made the back piece & straps.

Written pattern with row-by-row instructions (all the boxes/color switches are already counted for you and written in order): https://ko-fi.com/s/a250c7aa4a

For all the harries! Shop the cutest harry styles inspired jewelry here: https://lepetitesprout.com


Click to save this grid on Pinterest!

Happy crocheting & lots of love as always,

Mahum

taylor swift's folklore-inspired crochet bag | free pattern + video tutorial


Hi everyone! These are the reference notes for my folklore-inspired bag featured in episode 2 of my new bags series. Please refer to the youtube tutorial for a demonstration and in-depth explanations of front post/back post stitches.

Abbreviations/terminology

dc - double crochet / fptc - front post triple crochet / bpdc - back post double crochet

Front piece

Make a slip knot, chain 35, skip 3 chains (these 3 chains count as 1 dc), dc into the 4th chain, dc into every chain (total 33 dc stitches including the chain 3)

- To start a new row: always chain 1 & turn your work, then dc into the 1st stitch NOT the chain 1

Right/front side

Dc 2, 6 fptc (456123), dc 11, 4 fptc (3412), dc 2, 6 fptc (456123), dc 2

Wrong/back side

Dc 2, 6 bpdc (123456), dc 2, 4 bpdc (1234), dc 11, 6 bpdc (123456), dc 2


Jumat, 24 Mei 2024

heart granny square tote bag tutorial (beginner friendly)

Free, easy, and beginner friendly crochet pattern and tutorial for a Pinterest inspired crochet tote bag

Hi everyone! Here's a cute and easy tote bag tutorial that follows a repetitive pattern, requires minimal effort to create alternating rows, and is easily put together.

Here are a few things to keep in mind while using this pattern:

The heart granny square is not my original idea! With this pattern, I'm only taking credit for the way in which I crocheted the heart granny square into a tote bag. All the steps I took are either mentioned explicitly or linked to a specific technique or youtube tutorial I used. To make this, you should be experienced with some basic stitches and know how granny squares work. That being said, I can't wait to see what you come up with! Please tag me in your creations (or send me a picture!) and feel free to DM me on Instagram (@mahumcrochets) if you have any questions.

Materials & Terminology:

I used a 4.5 mm hook and around 100 g of 2 colors (I recommend using light and dark alternating colors!). Abbreviations: SC - single crochet, DC - double crochet, HDC - half double crochet, TC - triple crochet, SS - slip stitch, CH - chain, C1 - color 1, C2 - color 2.

A note on the instructions before you begin: This tote bag follows a technique that's VERY similar to my emma book cover pattern. If you've already crocheted that then you can skip ahead. I've also included some additional instructions in brackets for beginners, hopefully, those make things a bit clearer!

Part 1: Crocheting a heart granny square

Crochet a heart following this youtube tutorial: crochet heart granny square tutorial. Once you're done crocheting the heart, you can either keep following the video (don't forget to refer back to this pattern for the steps that come afterward) to make the granny square or follow the pattern below.

Border 1 (C1): Attach the new yarn color with a knot at the bottom of the heart. Work in the back loops ONLY.

Follow this pattern as you go around the stitches of the heart (don't skip any stitch):

Sc, hdc, dc, tc, ch 2 (this is the 1st gap), dc, hdc, sc, sc, sc, sc, ch 2 (this is the 2nd gap), sc, sc, sc, sc, hdc, sc, sc, sc, sc, ch 2 (this is the 3rd gap), sc, sc, sc, sc, hdc, dc, ch 2 (this is the 4th gap), tc, dc, hdc, sc into the stitch where you attached the yarn, ss into the next stitch.

Border 2 (C1): After you ss, ch 3 and in the same stitch and insert 2 dc (the ch 3 counts as your first dc so there are basically 3 dc in the stitch), ch 1, now make a CORNER by doing the steps in asterisks in the ch 2 gap closest to you: *3 dc into the ch 2 gap, ch 2, 3 dc into the same ch 2 gap*, ch 1, 3 dc into the 3rd stitch from the ch 2 gap, ch 1, CORNER *3 dc into the ch 2 gap, ch 2, 3 dc into the same ch 2 gap*, ch 1, 3 dc into the 3rd stitch from the ch 2 gap, ch 1, CORNER *3 dc into the ch 2 gap, ch 2, 3 dc into the same ch 2 gap*, ch 1, 3 dc into the 3rd stitch from the ch 2 gap, ch 1, CORNER *3 dc into the ch 2 gap, ch 2, 3 dc into the same ch 2 gap*, ch 1, ss into the top of the ch 3 you made at the start, ch 1 to fasten off and cut.

Border 3 (C2): Attach the new color with a knot into one of the ch 2 gaps made in border 2. Ch 3 and insert 2 dc in the same stitch (the ch 3 counts as your first dc so there are basically 3 dc in the stitch where you attached the yarn), ch 1. Now you'll be working into the gaps made either by ch 1 or ch 2 in border 2. Repeat *3 dc, ch 1* in every chain 1 gap. When you reach every chain 2 gap, repeat *3 dc, ch 2, 3 dc* to make a corner. Do this all around the square. When you reach the same chain 2 gap where you attached the yarn, insert 3 dc again, ch 2, ss into the top of the ch 3, and ch 1 to fasten off and cut the yarn to tighten. 

Borders 4 & 5 (C1): Attach the new color with a knot into one of the ch 2 gaps made in border 2. Ch 3 and insert 2 dc in the same stitch (the ch 3 counts as your first dc so there are basically 3 dc in the stitch where you attached the yarn), ch 1. Repeat *3 dc, ch 1* in every ch 1 gap. When you reach every ch 2 gap, repeat *3 dc, ch 2, 3 dc* to make a corner. Do this all around the square. 

When you reach the same chain 2 gap where you attached the yarn, insert 3 dc again, ch 2, ss into the top of the ch 3, DO NOT FASTEN OFF, turn your work, ss into the ch 2 gap (this is where border 5 starts), ch 3 and insert 2 dc in the same stitch, repeat the same steps as before to complete the border. 

Continue adding the borders by alternating between 1 row of C2 (steps from border 3) and 2 rows of C1 (steps from borders 4 & 5). Crochet 2 squares of the same size.

Once the squares are as big as you want, attach the alternating color in the ch 2 gap in the top corner, repeat *3 dc, ch 1* till the end. This will give your bag a more rectangular, tote bag-like shape.

free crochet pattern and easy tutorial on how to crochet a heart granny square tote bag

Part 2: Crocheting the straps

For the straps, start with a slip knot, ch 6 (or more if you want your strap to be wider), sc into the 2nd ch from your hook, sc in every stitch till the end (total 5 sc), ch 1, turn your work, sc into the 2nd ch from your hook, sc in every stitch till the end (total 5 sc again), continue crocheting rows of sc until it's the length you want for the strap.

Make 2 straps of the same width and length.


Part 3: Putting the pieces together

This part is up to personal preference! You can sew the 2 sides of the bag and the straps together or crochet with ss/sc (I prefer crocheting).

To attach the straps to the squares, I used ss. Attach the yarn with a knot on the wrong side of your square (the side our loose ends face) then ss the stitches of the strap and square together. 

To attach the squares together, I used the same yarn color that I used at the top to give it a rectangular shape. Then I sc in every stitch around the sides. This technique gave me an alternating color border around my bag without increasing its size.

And you're done!

I hope you found this pattern helpful, I'm still in the process of learning and trying to navigate the crochet community, so I'd love feedback from you! Please let me know what could've been improved or just your general thoughts on the pattern. I can't wait to see what you all create, don't forget to tag me on Instagram, and happy crocheting!